
⚡ Upgrade to the future of WiFi — faster, smarter, unstoppable!
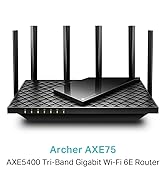
The TP-Link Archer AXE75 is a cutting-edge WiFi 6E tri-band router delivering blazing speeds up to 5400 Mbps powered by a 1.7 GHz quad-core CPU. It features SuperSpeed USB 3.0 for rapid data transfers, OneMesh for seamless whole-home coverage, and advanced security with HomeShield and WPA3. Ideal for gamers, remote professionals, and smart homes, it also supports Alexa voice control for effortless management.


| ASIN | B0B42GCD76 |
| Are Batteries Included | No |
| Best Sellers Rank | 644 in Computers & Accessories ( See Top 100 in Computers & Accessories ) 3 in Routers |
| Brand | TP-Link |
| Colour | black |
| Connectivity Type | Wi-Fi |
| Customer Reviews | 4.3 4.3 out of 5 stars (4,122) |
| Date First Available | 14 Jun. 2022 |
| Guaranteed software updates until | unknown |
| Item Weight | 1.53 kg |
| Item model number | Archer AXE75 |
| Manufacturer | TP-Link |
| Operating System | Custom Router OS |
| Product Dimensions | 27.25 x 14.72 x 4.92 cm; 1.53 kg |
| Series | Archer AXE75 |
| Wireless Type | 802.11ax |
C**N
Upgrade from your crappy Virgin Superhubs to one of these - you won't regret it!
If you, like me, are a Virgin Media customer who has been gnashing their teeth in frustration at their absolutely rubbish so-called 'Superhub 3.0', then prick up your ears (and/or eyes) and read on. I've had my Superhub for about five years now and it was ok at first and its coverage used to reach the very rear of my long, narrow house, but over the past few months its WiFi has been randomly dropping until earlier this week when I received a message from Virgin Media saying 'Your account has been upgraded - reboot your kit', so I duly rebooted the Superhub only to find that the WiFi from it had completely stopped working. My partner and I both work from home, so this wasn't the best, but after some hair-pulling moments of panic I discovered that the ethernet ports on the back of the superhub still worked, so I was able to get some semblance of connectivity restored (the WiFi hotspot feature in Windows 11, indicentally, is absolutely superb) and decided that it was time to switch the superhub to modem only mode and purchase a WiFi router. After a little bit of hunting and research, I whittled my selection down to a few routers. The TP-Link Archer C64 obviously won the battle due to its bargain basement price and richness of features, so I snapped one up and it landed into my grubby little paws a few hours later, and I was quickly tearing through its cellophene wrapping to get a gawp at it. >>> WHAT'S IN THE BOX? In the box, you'll get the router itself, a short ethernet cable, the power adapter and a couple of quick-start instruction books. Bonus green points to TP-Link for making the packaging purely out of cardboard and better for the planet. >>> FIRST IMPRESSIONS? The first thing that struck me about this router is just how small and light it is - it's really tiny and weighs next to nothing. It's also square, which is a radical departure from the routers I've bought in the past which resembled artfully modelled matchboxes, and is very minimalist in its design. At each corner are its massive antennas which make it look like some sort of dead robot/crab creature. There are a row of LEDS on the front of it and, around its back, there are four ethernet ports (with a dedicated one for plugging into your hub) and a WPS/Reset button and the input for the power adapter. >>> IS IT EASY TO SET UP? Well, I work in IT and have set up a few routers in my time so I've got a fair bit of experience in such things. Saying that, I did find this router particularly simple to set up, mainly thanks to the TP-Link app which guides you through the setup process. From plugging it in, setting the Virgin Superhub to modem-only mode and getting the Archer C64 router up and running and pumping out its WiFi connection, it took less than 15 minutes, I reckon. Less IT savvy folks might find it a little more difficult (the app isn't great at explaining what you need to do next) so you might want to grab an IT-savvy pal to help you if you're not too sure what to do. >>>WHAT FEATURES DOES IT HAVE? Despite the relatively cheap price of the Archer C64, I think it's pretty fully featured. It's got all of the bells and whistles such as a built-in Firewall, Dual SSIDs, DMZ, port forwarding and all sorts of things. >>>HOW DOES IT PERFORM? Well, coming from a Virgin Superhub 3 - a hub that's not exactly well regarded - this thing is lightning fast and has an impressive range. The superhub failed to reach the bathroom at the very rear of my old, long, narrow house (with thick walls), but with the Archer C64 I'm getting a fantastic signal and good speeds. Running a speed test sees this router hitting and sustaining the maximum speed my contract is capable of. You can't ask for more than that! >>>SUMMING UP This is an absolutely cracking router for the price and, if you're sick of the hub that came with your broadband package you should definitely consider getting one of these!
D**Y
All over good
Secure and good connectivity, very easy to installation and affordable for everyone and store in small place , good WiFi attachments
B**T
Access point mode was problematic
I had the C50 (v6) firmare version 0.9.1 0.2 v0001.0 Build 210111 Rel.37983n(4555) and just replaced it with an Archer A7 as I stupidly didn't notice the ports on the C50 were 10/100mbit. My intention was to use the C50 as an access point. The setup was Virgin SuperHub 3 with an ethernet cable running from that into my loft, then use the C50 as an access point. This proved to be painful. I could not for the life of me get the C50 to work in "access point" mode with the ethernet cable going from a LAN port of my virgin router into the WAN port of the C50. My latop could connect to the C50 but had no internet and couldn't access the virgin router on 192.168.0.1. How I ended up getting this to work as an access point was as follows: Getting everything ready =================== 1. Unplug all ethernet cables from the C50 – anything in the WAN port or LAN ports, take all of them out 2. Factory reset your C50 (hold in the reset button for at least 2 seconds) 3. You will need to connect to the C50 from your computer – either use Ethernet (in which case you would connect your computer to a LAN port on the C50, or WiFi). I’ll use WiFi 4. I make sure my WiFi connection is set to obtain an IP address and DNS automatically. You can follow similar steps for your ethernet adapter if you do not plan to connect to the C50 using WiFI: a. Go to Control Panel -> Network and Internet -> Network Connections b. Right click on my WiFi adapter and select Properties: c. Select “Internet Protocol Version (TCP/IPv4) and select Properties d. Ensure you are set to obtain IP address and DNS automatically:e. Press OK then press Close on the WiFi adapter properties window Work out out which IP address to give to the C50 ====================================== We need to work out the IP address range our main router uses for DHCP. We then need to work out an IP address outside of that range that we can assign to the C50 later in the process. The instructions here will be specific to your main router. In my case, my main router is a Virgin SuperHub 3. 5. Connect to your main router via ethernet or WiFi and sign into the admin page (in the case of a Virgin SuperHub 3, I go to http://192.168.0.1) 6. Find the section for your main router’s DHCP settings to see the range of IP addresses it will assign 7. With the information on that page on my virgin super hub, and the fact I knew the ip address for the main router (i.e. the virgin one), I now know: a. My virgin router uses 192.168.0.1 – I definitely don’t want the C50 using that b. My virgin router will also assign IP addresses in the range 192.168.0.10 -> 192.168.0.254 via DHCP c. I want to give the C50 something that won’t be used by the virgin router so I’ll pick anything from 192.168.0.2 -> 192.168.0.9 as those IPs won’t be used by the virgin router 8. From step 7, I’ll just pick 192.168.0.2 Setting up the C50 =============== I now disconnect from the main router and connect to the C50. In my case, I’m using WiFi. 9. Ensure you have connected to the C50 via WiFi (or ethernet) 10. Navigate to http://tplinkwifi.net/ in your browser to go to the C50 admin console. Note that if this link does not work, you can: a. Open a command prompt b. Run “ipconfig” c. Take note of the Default Gateway value d. Enter that http://<default-gateway-value> into your browser. In my case http://192.168.0.1 11. Since you have performed a factory reset, the admin page will ask you to enter a new username and password, so do that and press Start 12. Go to Operation Mode and ensure Wireless Router is selected – DO NOT select Access Point which I know seems counter intuitive. You shouldn’t have to press Save here as it will already be set to Wireless Router assuming you had followed the instructions to factory reset the C50 13. Select Network -> LAN. Enter your IP address you calculated back in step 8. In my case, I chose 192.168.0.2. The subnet mask needed for that IP is 255.255.255.0 so I enter those values and press save 14. I then need to wait for the C50 to reboot 15. Once it has rebooted, ensure I am connected to it via WiFi (or Ethernet) and browse to the admin page using the http://tplinkwifi.net link or the IP address I just set in step 13. Log in. 16. Go to DHCP -> DHCP Settings 17. Set the “DHCP Server” value to Disable: 18. Press Save. Note that this does not seem to reboot the C50 automatically. You should reboot now by selecting System Tools -> Reboot -> Reboot button 19. Once the C50 has rebooted, connect to the admin page again and login 20. To recap, we should now have: a. Operation Mode -> Wireless Router b. Network -> LAN -> IP Address/Subnet Mask -> Appropriate values based on step 8 c. DHCP -> DHCP Settings -> DHCP Server -> Disable 21. Now we are ready to connect the C50 to our main router. Ensure one end of the ethernet cable is a LAN port of the main router and the other end is in the LAN port of the C50 (NOT the WAN port). 22. If you now go to status, you should see a connecttion listed under the Ethernet section 23. At this point, my laptop is connected to the C50 via WiFi but Windows 10 is still showing no internet. I simply disconnected my WiFi adapter from the C50 then connected again and voila – everything is working fine. If I connect to 192.168.0.1 in a browser, I see my Virgin SuperHub settings. 192.168.0.2 connects me to the C50 settings. I did not have to do this with the Archer A7. With that it was as simple as putting the A7 into access point mode and connecting an ethernet cable from a LAN port on my virgin hub to the WAN port of the A7.
C**R
Worth its cost
Bought this when I was shopping for a WIFI 6e router after some research into cost vs performance etc. I chose this product as I was familiar with other TP-link products and was happy with their quality and usability. This product was also on the more affordable side of WIFI 6e routers at the time of purchasing. Firstly, the setup was easy and relatively quick. The user controls and network settings were well layed out and easy to change. The Router gives a strong signal and good connection through the gigabit RJ45 ports too. I haven't had any dropouts or lost signals through the router and had nothing but consistent service. I would highly recommend this router to anyone wanting to upgrade from the pitiful routers that internet service providers (ISPs) provide. Just be mindful that the ISP mostly want their equipment back if you cancel your contract so as tempting as it is... dont bin your old router.
L**K
Great bit of kit
Putting virgin hub into dumb mode and swapping out for this is by far one of the best things I have done in a while. Great connectivity throughout the house. I like that I can easily share guest network. Simple and easy setup.
K**N
Excellent
G**A
Muy fácil de instalar. Buena calidad de señal y velocidad.
ح**ل
المدي بتاعه ممتاز وسريع جدا
I**H
I bought this and I was happy with the wifi 6e. However, all ports are only 1GBPS. This means the 2.4GBPS through wifi 6e is not usable in most scenarios. For my PCVR I want my PC to connect to the router with a speed equal or higher than wifi. So, I had to buy another wifi 6e from Asus with ports of 2.5Ghz. Even link agrigation is not possible in this model. So, put some more money and buy a good model with faster LAN ports, 2.5 or 10GBPS.
U**C
The only problem is that it doesn't have a DSL port, only a WAN port. however, that wasn't an issue for me because I only needed the 5ghz wifi connection so i connected it to my basic WE router that i got from the ISP. The connection via Airlink is seamless, i can not tell the difference between it and using a cable, highly recommend for quest 2 instead of buying a long cable for the same price.
Trustpilot
1 month ago
2 weeks ago


