

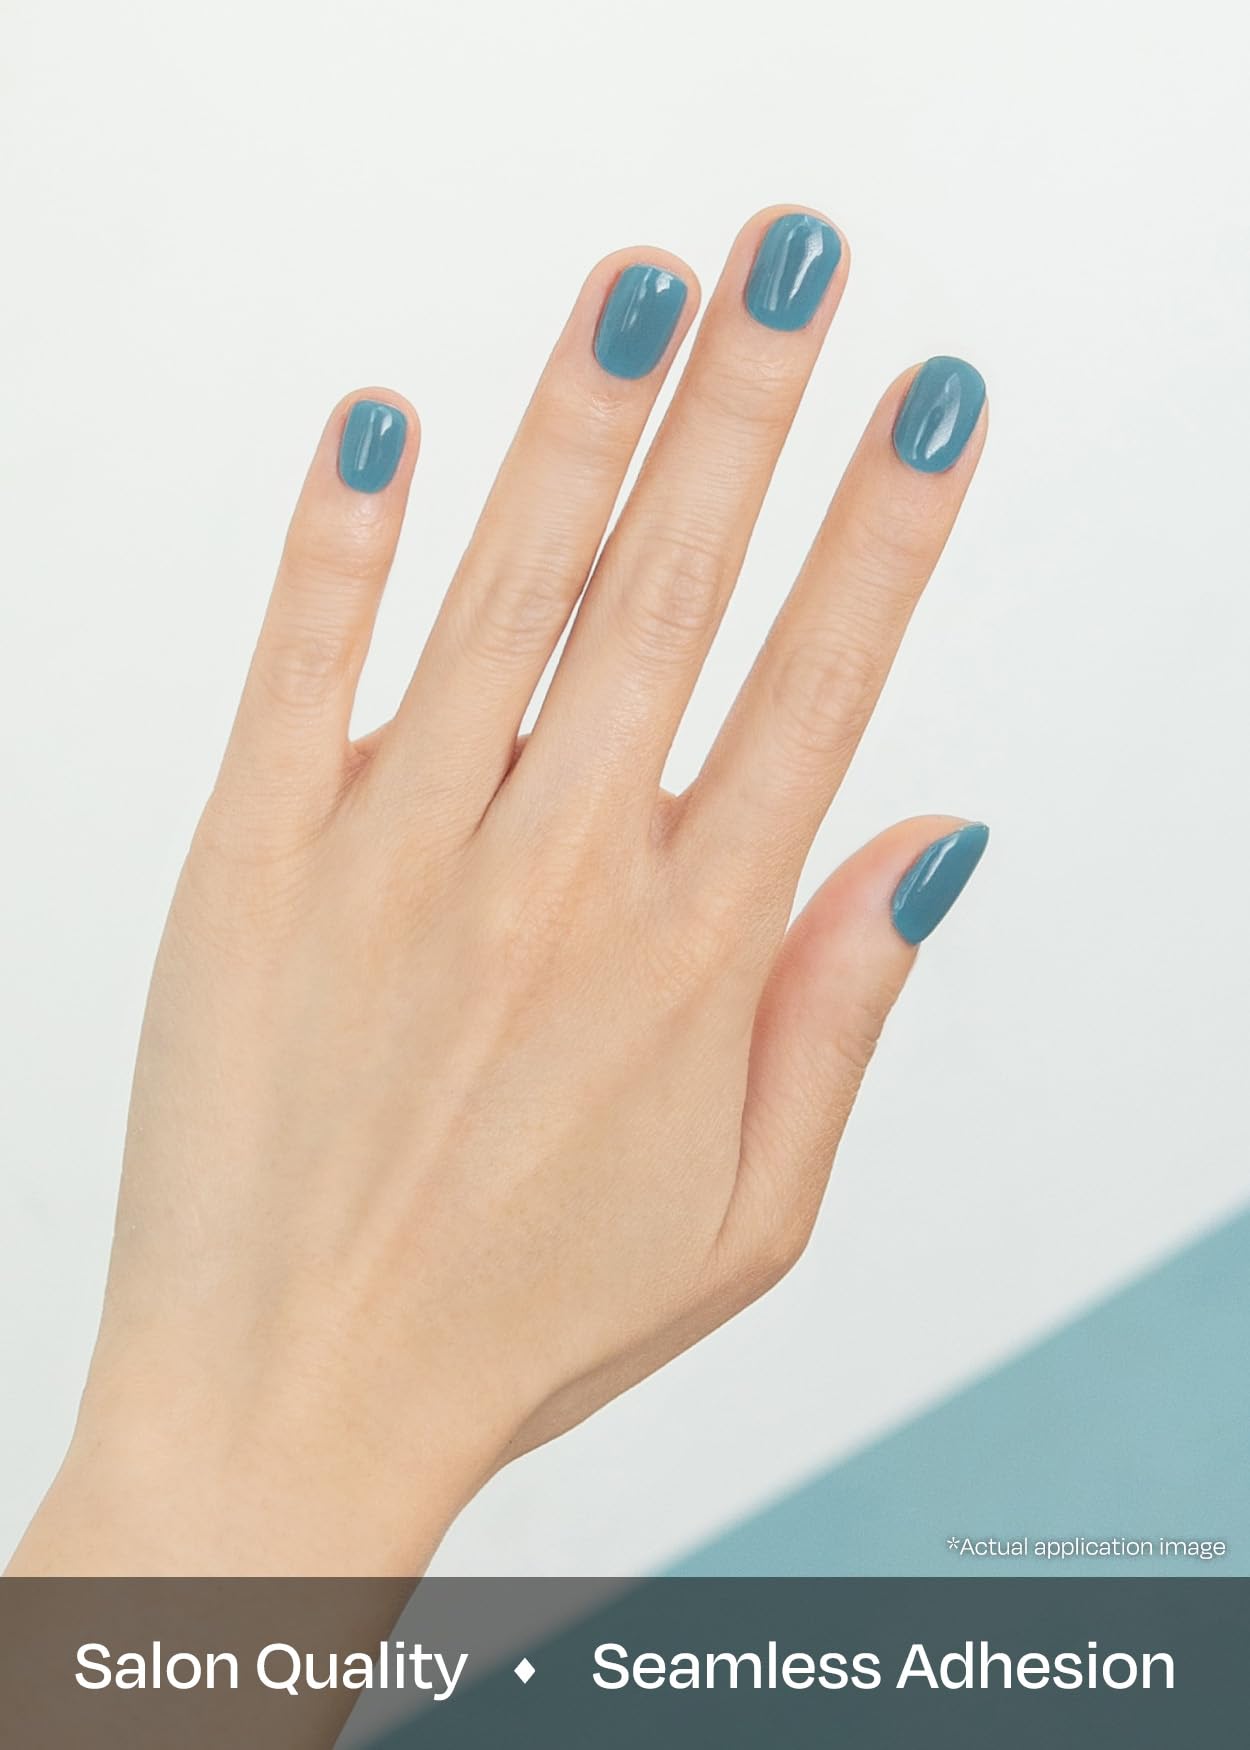


💙 Get salon-perfect nails in minutes — because your hands deserve the spotlight!
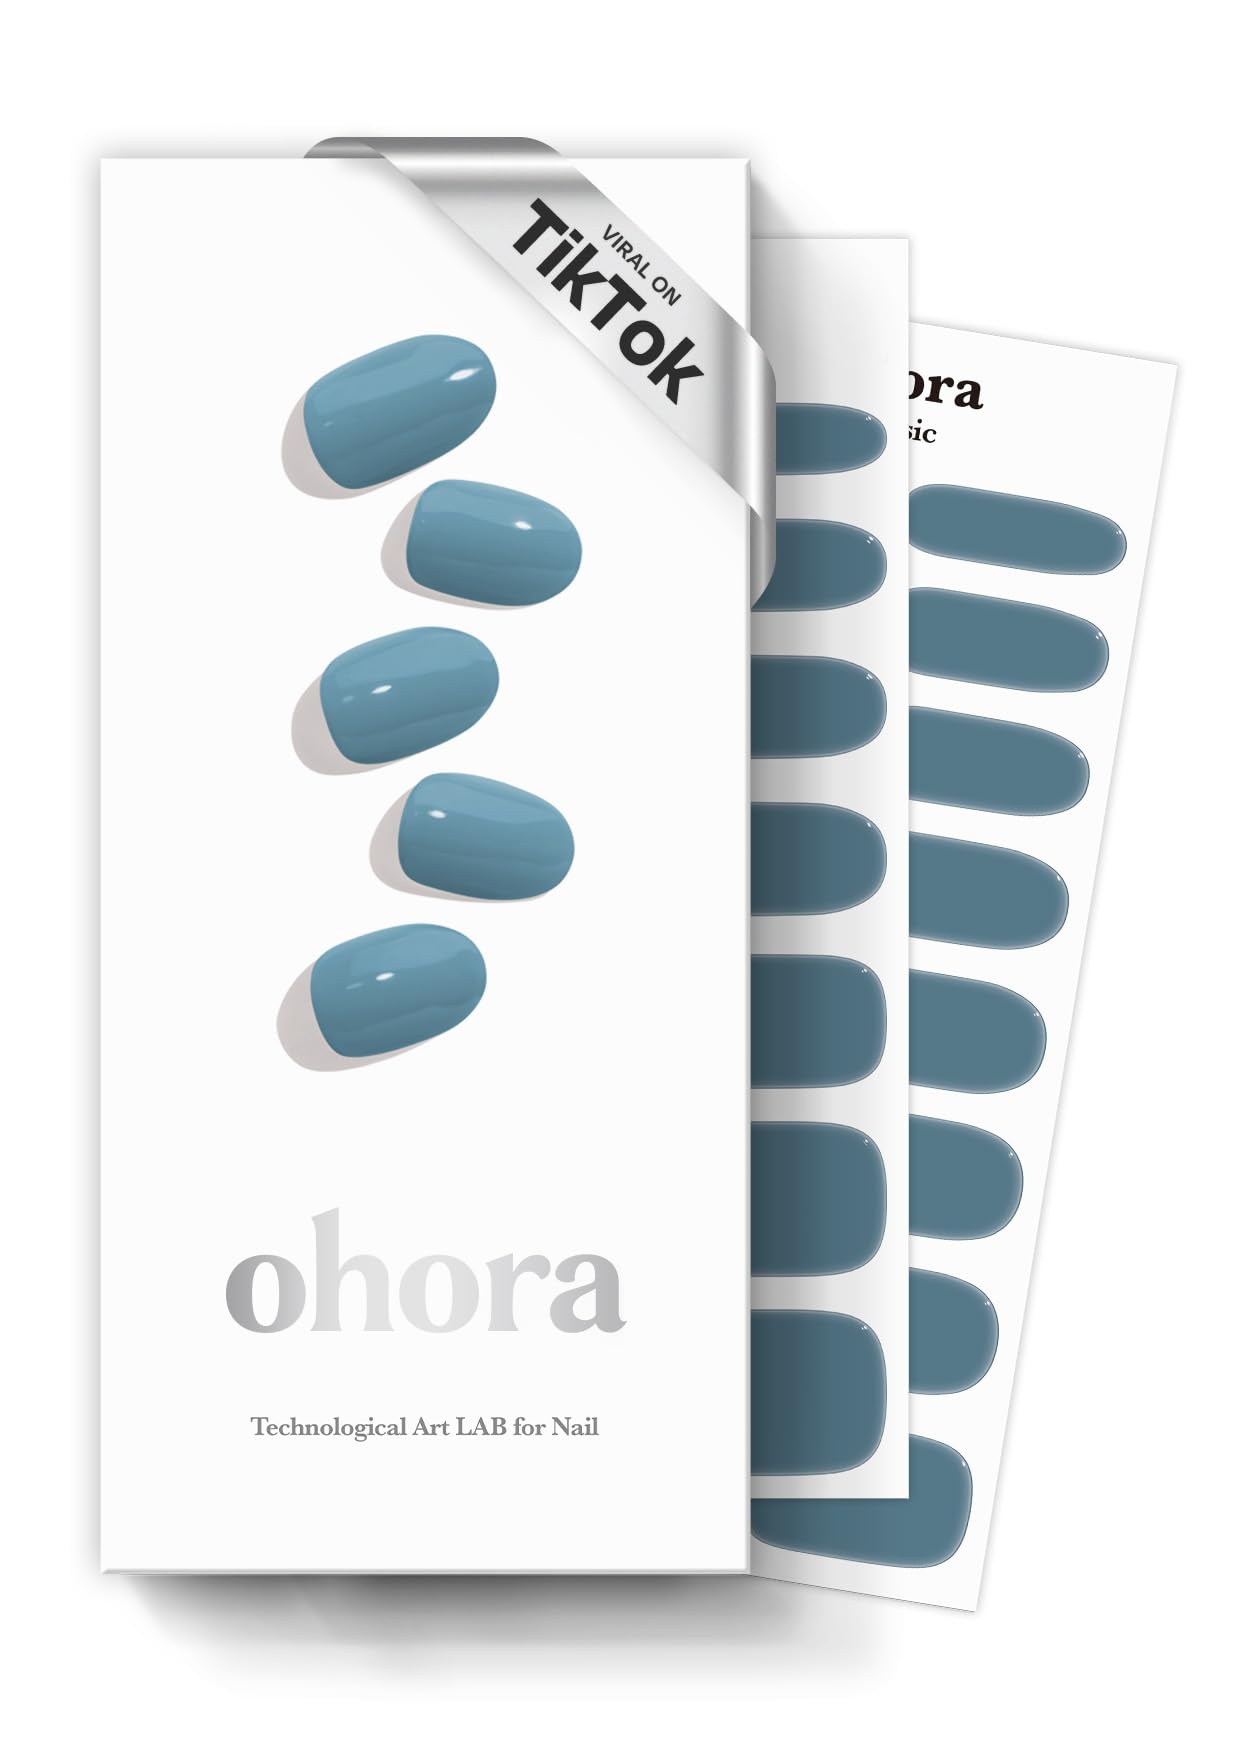
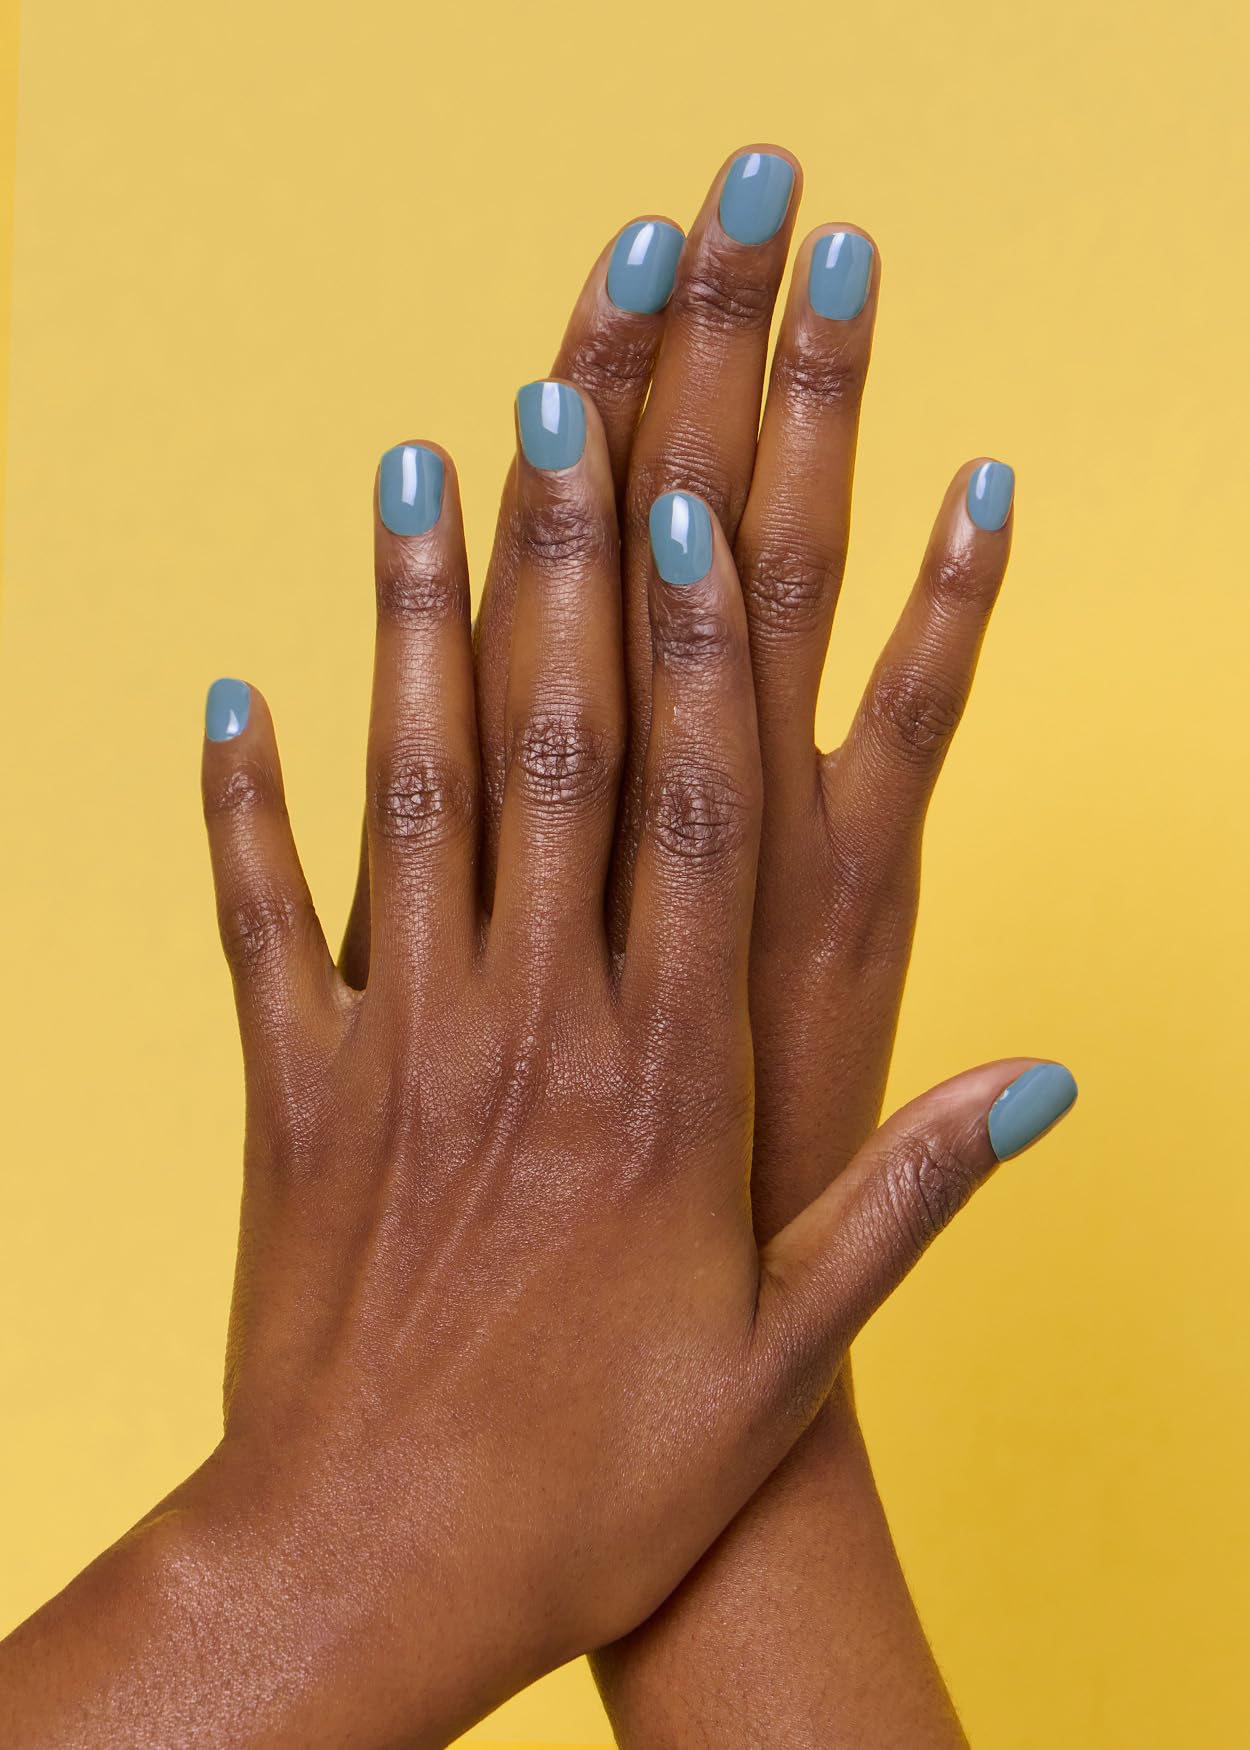
ohora Semi Cured Gel Nail Strips in N Washing Jean blue deliver a professional, long-lasting manicure with 30 pre-sized gel strips made from real liquid gel. Designed for all nail shapes, these semi-cured strips cure under any UV/LED lamp, lasting up to two weeks with a waterproof finish. The kit includes essential prep tools and is vegan, cruelty-free, and easy to apply and remove—perfect for busy professionals seeking salon-quality nails at home.


| ASIN | B0861LMSS2 |
| Best Sellers Rank | #2,471 in Beauty & Personal Care ( See Top 100 in Beauty & Personal Care ) #4 in Nail Art Stickers & Decals |
| Brand Name | ohora |
| Color | N Washing Jean |
| Customer Reviews | 4.0 out of 5 stars 3,675 Reviews |
| Item Form | Gel, Liquid |
| Item Shape | Oblong |
| Manufacturer | ohora |
| Material Type | Gel |
| Number of Pieces | 30 |
| Pattern | Solid |
| Unit Count | 1.0 Fluid Ounces |
N**᭡
Nail prep and acetone trick - and other techniques to improve wear time
Ever since I learned of the acetone trick I have not had any issues with hairs getting under them, it is literally a game changer. Thorough nail prep is also key for prolonging the length of time they remain adhered to the nails. Mine will last a solid two + weeks if I do the following : - I put the set I'll be using next to my space heater but still in their black box to keep light from activating prematurely. When warmed, they will be ultra flexible / formable to match one's nail shapes. The use of a heater is as important to success as the acetone trick, in my experience. The first few times before I realized heat was necessary, it was quite difficult because they were so stiff. -Of course, good nail prep like pushing cuticles back and a remove extra cuticle skin , gentle file of the nail bed ('roughed up' nail bed helps adhesion) , Once finished with the preparing, was hands with dawn or whichever kind of dish soap when time to start application. After washing hands and nails with the anti grease soap (anti grease dish soap or similar helps remove oils that will interfere with adhesion) Next- is to wipe your nail beds with the alcohol prep pad that is included. It helps to wipe finger tips skin with the alcohol wipe since we touch the strip when applying, and we need the least amount of oil possible, otherwise they will pop off shortly after. I now just put rubbing alcohol all on my hands and nails. . If nail prep is skipped, the nails will not stay on long. Period. -I use a pair of eyebrow trim scissors to trip off the excess, though nail clippers will do. -when I apply the strip, I place it beginning from one side so just one half of the nail has the strip on, so the other half of the strip is still essentially not touching , so i can pull /stretch the non adhered side (when necessary) so all of the nail is covered /reduces the rigid line sticker look. If they have not been warmed up with the heater this will not work. I keep the heater on in my area throughout application. -After I have the strips on, but before any curing with light, it is now time to proceed with the two step magic method of the acetone trick. The result of this technique literally 'seals' the nail strip around the nail edges, eliminating the super ew hair snag feeling. I cannot recommend this step enough. Also, this sealing prolongs overall wear. You can purchase the 100% acetone from amazon for under $10. So after applying my nail strips while they are still pliable and not at all cured yet, take your 100% acetone and pour a bit in the cap of the bottle or any small dish- Step 1 of 2: Dip a paint brush or a nail polish brush in the acetone and apply a generous amount all around the edges of the strip/skin. (Do make sure to press them first before acetone so as not to get any underneath ) We are basically 'melting' the polish down a bit to seal them against the nail bed. So apply the acetone around the end sides of your nails, avoiding the center part obviously. Step 2 of 2: After applying the acetone along the sides/edges of the strip /nail, wait like 45 -50 seconds then use the pusher/ orange wood stick flat edge and press along each of the areas where we just applied the acetone. Do it gently at first to test that the acetone is dry, bc it will cause the strip to have a 'gummed up' effect if pushed on too soon. Not a huge deal, just wait a minute more or so. Finish pushing down along the edges with the orange wood stick or whichever tool you prefer. I cannot stress how imperative these two steps are! I can now easily get about two weeks wear, zero hair snagging, this is essential. -Now in the application process it is finally time to cure the semi cured gel . nail lamps for curing these are like 11$ I use ohora s and it has preset times i do about 4 long cycles. They will then look shiny and pretty. -After they've cured -Use the nail file to refine and file down any areas that are still a bit over the nail (or if you did not cut the excess strip when applying, then file it all away filing in one direction (I highly recommend trimming them when applying but don't worry about perfection, as that is what the filing is for) So just refine to your natural nail nail length, ensuring there are no areas that are longer than the nail length itself (otherwise they will be prone to breaking easily ) -I have found that semi cured nail polish allow my nails to grow /keep their length (with exceptions obviously ) but overall I've only been able to actually have a bit of length to my natural nails when I keep them 'protected' with these nail strips. I have tried a few other brands out of curiosity, however, for my nail shape I have had the best results with ohora . My favorite colors are n nudist and n Gold Coast. I've tried many different colors, but I stick with N Gold Coast these days. I also like N Clean white. I am not affiliated with any company. I wrote this for anyone that may find these tidbits helpful, or for those that are here reading are not getting good results wondering what is causing them to pop off so soon, etc. I did not come up with the acetone trick myself, I learned it from Thatohoragirl's tutorial. I have been using these for some years now. I almost gave up after my second or third applications popped off shortly after, before I knew the importance of nail prep, before I knew of the acetone step, and keeping them warm during application. The process of applying sometimes gets annoying, but it's way better (to me at least) than waiting for strong smelling, short lasting, nail polish to dry. The cured strip really feels similar in strength as gel nails. Very much a game changer in having pretty nails that feel hard like gel yet easy to do yourself and less costly than going to get them done.
M**Y
Great for the money. Love color.
I like the vibrant red color they are and the way they look when applied. I put them all on, cut them and shaped them the way I wanted them. They were so easy to put on. Then, I cured them 3 times for safety. They fit my nails quite well and have a rounded end and a squareish end in shape. I am writing this review on day 11 and they are still holding up. It's an excellent value for the money. I will say that right now if I run my fingers through my hair they're starting to get caught in my hair and I don't love that. Theses ones are not super transparent but a little transparent. I attached a picture of day 1 (picture with 4 fingers) and day 11 (picture with all 5 fingers).
S**N
Didn’t last too long compared to other colors
These were very cute, but didn’t last as long as some of the other colors. I got red before these and they lasted me about two weeks, I prefer ones that last a long time because I have my hands in water a lot at work and overall wash my hands quite often. I do the same routine when applying which is removing cuticles, buffing the nail surface, wiping with iso alcohol and applying a gel top coat after I cure and file them. Same routine I did with the red color (same brand) but these peeled off within hours of application That being said, I did love the opacity of the color, I’ve gotten the red and green before which were a tad translucent (not that you could tell once they were applied) but these didn’t have that translucency - I’ll be trying regular gel polish to see if it’s a better fit for me than the strips Here’s a few things I do really love about the brand though - adds protection/ hardness to your nail - it comes with a lot of different sizes so you can redo a nail here and there if one peels off - they cure quickly, I usually do 90s and 30s just to be safe but they do feel cured even after just 60s All that being said, I often wear gloves and do a lot with my hands at work so with regular polish it often chips or peels, and my nails break easily. I haven’t had any of my nails break when wearing any of these strips due to the durability they add which is something I do really love. The red color however stuck a little too well and did some damage during removal but that’s on me for not removing them properly lol.
S**T
fantastic!
UPDATE: The last pics on the review are N Green Tea. This is a stunning set! It comes with 4 different patterns that all work together, and it is so beautiful. This might be my favorite set yet! As expected, they went on easily and adhered perfectly to create strong and beautiful nails. I absolutely love this set. It's subtle but stunning! I chose the N Glow Blush color, which is a light, semi-sheer pink with the center of the nail being a little bit more pink, followed by subtle silver sparkles that start at about the mid-nail and become more dense up to the tip. These nail strips are so pretty and subtle, but they make my nails look special. The little bit of sparkle is just enough, and they are so pretty when they catch the light. I originally chose them because I've only just started using gel nail strips, so I wanted to stay subtle with my color choices while I learn to perfect the application of the strips. But I've had them on for a few days now, and I find myself looking at them often, and I love them. This is only my third time using them as each set lasts a full two weeks before I start to feel like my nails are getting too long for comfort and change them out for new ones. they don't chip, come off, or break. They are amazing. Honestly, I am completely blown away by the ease of applying these and the professional-looking results. To remove these, I used a few drops of the Ohara remover, and I timed it last week. It took me 4 minutes total to remove the last set, and my nails underneath have never looked healthier. It took me a total of 1 hour and 8 minutes to remove the old set, cut and file my nails, push back the cuticles, put on the new strips, and cure them. So I'm not super quick yet, but I love that there is no smell, and my husband commented on this as well because I did it while we were having coffee in the morning. I found that I was quite a bit quicker doing my second hand, so I think that over time, I can get the entire process to around 40 minutes. That's my goal anyway! I love being able to do this at home with such stunning results. My nails look better with these strips than when I was going to the salon. And the value for two sets is unbelievable! Truly, I love these strips. I am not a 'girly girl' either. I work from home, I rarely wear makeup, and for the next two weeks, I will be laying new floors and baseboards with help from my dad and brother. I love that these strips make my nails so much stronger. They are not constantly peeling, breaking, and chipping. For that alone, I will continue to use them. But my nails looking crazy cute and professionally manicured is a really nice bonus! Highly recommended! UPDATE: I just tried the P Tanning Bear for toenails for the first time. I normally get pedicures at a nail salon with traditional polish, so I was nervous to try doing this myself, but it was really easy. The gel strips stuck securely, and it took me about 45 minutes total to do. A user error- it was a nice day and I decided to do my nails outside. These really do get hard in UV light, even without a lamp! As I was finishing my second foot, I noticed that they were getting hard to push into place. Then I remembered - sunlight!!! Doh! I did get them done in time, but I'm pretty sure that the rest of the set is toast. My fault! I did not even bother to use the UV light. I just sat outside for about 10 more minutes, and they are hard as can be. I've had them on for a few days now, and they are comfortable and cute, and they are staying put. I have had them on for 9 days now, and they still look like I just did them. I was a bit worried because they were curing naturally since I put them on outside, so I thought the last few nails might now last, but they are doing great and I love the way they look!
B**E
Beautiful nails
Beautiful color. Good feeling. Easy to put on but time consuming. Easy to come off. A little pricy but overall good product
L**S
Beautiful and long lasting
Love these nails! The color is beautiful! Putting them on is so easy, and they last longer than any other brand I have tried!
M**D
New and improved - now I LOVE!!
I’ve been using Ohora for a couple of months now. Definitely has a learning curve, but now that I’ve figured that out, and I’ve noticed some improvements with this particular set, I am thrilled! Here’s what is improved on this particular Valentine set: I must have huge nail beds or something because my last few sets weren’t quite large enough to cover my thumb nails entirely, even with the stretching into place. It was mostly noticeable to me, so I dealt with it. This set has noticeably larger pieces to choose from and my entire thumb nail was covered perfectly. I also dealt with chipping and ripping a lot sooner on the other sets but this felt just a wee bit better. The pic attached shows my nails on Day 13. I did have a few chips this week and replaced three of the nails, but overall, still looking awesome! Now, I do have a job that is part-desk, part-labor. I have to be careful when doing the labor part or they do undergo a lot more wear and tear. When I’m doing the desk job mostly, my nails are fine. Some other things I’ve learned: use a top coat and do NOT use theirs. It just didn’t withstand use. Their primer also actually made the nails come off more easily, and not in a good way. I was losing them too soon. When I didn’t use their primer and put the sticker directly onto my buffed nail, the stickers stayed on much better. DO use their Pro Easy Peel Remover. Let it sit for two minutes before using a tool to help remove the sticker and use it again if it doesn’t come off all the way. This definitely helped reduce the damage to my nails. You’ll also definitely want to manicure your nail beds and remove extra cuticles, pushing them back and creating a nice clean surface for the sticker to go onto. Also invest in a nail brush and 100% acetone. This was one of the best tricks I discovered: use the brush to run along the edge of the sticker where it meets your cuticle. You’ll have to do it a little bit and it will smudge up the sticker a little, but it makes for a very beautiful slope down to the cuticle so it looks like it’s been painted AND helps prevent your hair getting stuck in them. Once you put the topcoat on after smudging the ends of the sticker, you won’t see the smudging in the slightest. The topcoat fills that up perfectly. You MUST use the topcoat afterwards to seal it all down and again, do NOT use theirs. I use a professional one. I only hope that the new sets I order from here on out have these improvements because I wouldn’t give the sets I’ve used before the same rating. LOVE these and they were adorable for Valentine’s.
A**C
They work very well but...
Overall they get the job done, works fantasticly, look amazing and last for about 2 to 3 weeks. I even got compliments on this color in particular because its a nice shade and it's a little bit transparent. I used them because I needed to go to an event and didn't have time to go to a salon nor wanted to waste too much money on nails. Here are the pros, cons and recommendations: PROS: - They have some kind of layer on top that even though you use your fingers to apply, it won't leave a fingetip mark on top of them unlike other brands. - They last for about 2 to 3 weeks depending on how much work/picking you do with your hands. - The designs and quality it's really nice and it comes with a few tools for you to use. - The stickers are quite long so if you have long nails it will work just fine. CONS: - You need a cabin to cure them otherwise it won't work obviously. - They don't look professional unless you apply a top coat on them because it doesn't leave that "thick nail" look like you get when you go to a salon. - They might be a little hard to apply at first because you don't know which size might fit your nail. - The stickers are a little thin in wideness so if you have wide nails I doubt it will work on you. Even though you can stretch them, when you cure it it will shrink back a little. - When they start to lift a bit, grime and dirt will get stuck in those parts and might be noticeable. My hair would get stuck on the lifted parts whenever I brushed my hair with my hands. RECOMMENDATIONS (Updated): - I bought a 6 dollar small cabin and it worked just fine. I recommend you cure them for 2 minutes for better results, otherwise they will be a little soft or sticky. - If your small cabin has a USB cable, do not connect to the computer to use it. I realized that the UV light is weaker when connected to a PC compared to conencting directly to a socket. It was just not curing at all for me... - For a more professional look, get a gel top coat! it will be shinier and look much better and give you that "thicker nail" effect that you get when going to a salon. - After using it several times, to avoid them lifting and dirt and hair getting stuck, I recommend sealing the edges with topcoat! Specially the top part (cuticle area) and bottom part. - Cut the excess before curing because once they harden, if you cut them, they might break and ruin. - When they start to lift, BE PATIENT. If you start to pick them or lift them like I did because I'm anxious, you will get part of your nail bed ripped as well... - I got the product of the same brand that helps you remove them, not very sure if I'm using it properly but I don't really think it helps that much. Also, be careful when touching plastic when you have this product on your fingers, I feel like it kinda melts the plastic or leaves a sticky residue. - I wanted to remove them after 1 week of use because they were getting quite unconfortable. So I found that the best way to do it is, soaking them in acetone and they will start to soften and melt. It takes a while, it took me 20 minutes per hand or maybe less. You soak them, pick a bit with a wooden pick and soak them again until they start to melt and break by themselves. Be patient and don't pick too hard! This way you avoid damaging your nailbed.
Trustpilot
2 weeks ago
5 days ago


