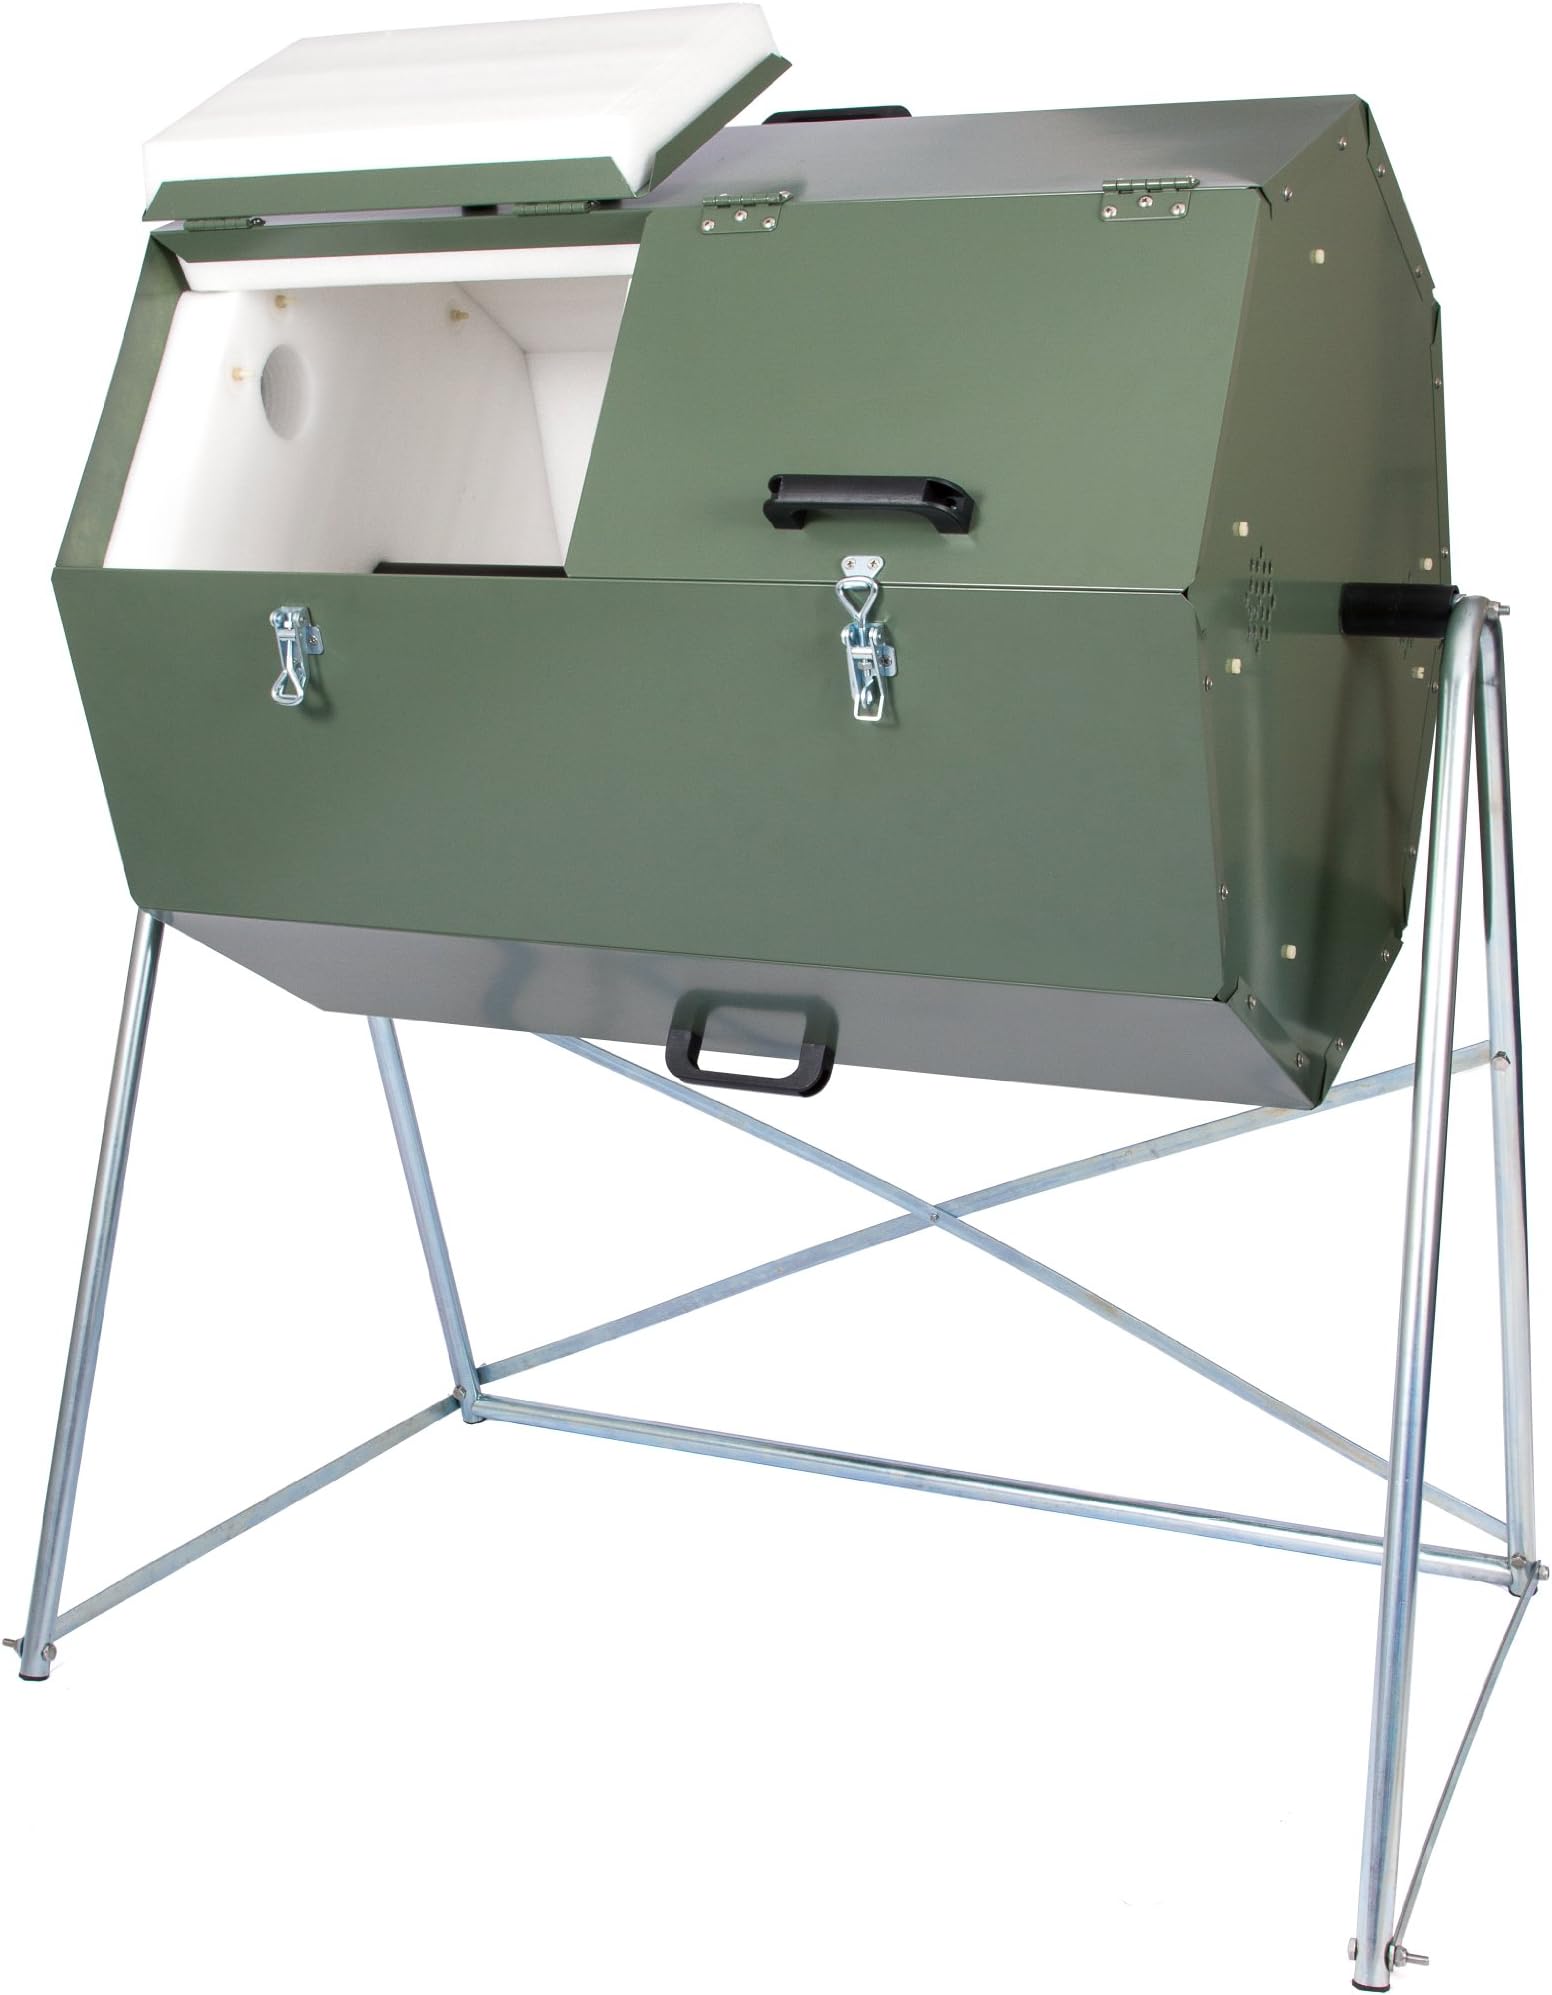


Joraform JK270 Compost Tumbler
Product ID: 58006329
Details
- BrandJora
- Capacity70 gallons
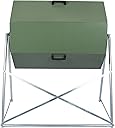
- ColourOlive Green
- Item weight52 Pounds
- ManufacturerJoraform
- MaterialMetal
🔥Insulated >65°C heat
♻️15kg weekly capacity
🛡️Galvanized rust-proof metal
Desertcart purchases this item on your behalf and handles shipping, customs, and support to Brazil.
♻️ Turn waste into wonder—compost like a pro, effortlessly!
The Joraform JK270 Compost Tumbler is a premium insulated composting system designed in Sweden for fast, hygienic kitchen waste recycling. Featuring dual compartments and a 15kg weekly capacity, it handles all food scraps including meat and citrus. Its galvanized steel build guarantees durability and rust resistance, while the insulated chambers maintain temperatures above 65°C to speed decomposition and eliminate odors. Ideal for eco-conscious professionals seeking a sustainable, low-fuss solution to reduce waste and enrich their garden soil.


| ASIN | B004U7LXHS |
| Best Sellers Rank | 1,651,122 in Home & Kitchen ( See Top 100 in Home & Kitchen ) 570 in Indoor Compost Bins |
| Brand | Jora Composters |
| Brand Name | Jora Composters |
| Capacity | 70 gallons |
| Colour | Olive Green |
| Customer Reviews | 4.3 out of 5 stars 271 Reviews |
| Item Dimensions L x W x H | 114L x 76W x 130H centimetres |
| Item Shape | tumbler |
| Item Weight | 52 Pounds |
| Manufacturer | Joraform Sweden |
| Manufacturer Part Number | JK 270 |
| Material | Metal |
| Material Type | Metal |
| Model Number | JK270 |
| Product dimensions | 114L x 76W x 130H centimetres |
| Shape | tumbler |
| UPC | 013964468595 |
D**B
Every household with a garden should own one of these.
I have used a Juraform 270 litre insulated composter for many years. I have used various forms of composting methods including other commercial composters. This is by far the best commercial composter on the market for domestic use. I fill mine with garden and kitchen waste including raw meat etc. To establish a good mix of nitrogen (greens) and carbon I purchase a supply of wood pellets from my local pet store. The wood pellets have a multi purpose. Firstly they provide carbon, secondly they help mix the contents in the tumbler as you spin the tumbler which in turn provides oxygen and thirdly they help to absorb excess water from the kitchen and garden waste. The right mix of nitrogen and carbon creates the perfect environment for microorganisms to break down the waste and create heat. The heat helps to kill seeds e.g. weed seeds and also to kill disease from garden waste e.g. blight on tomato plant leaves etc. Tomato seeds do tend to be very resistant to heat so beware that your finished compost might sprout some tomatoes plants here and there. In the warmer summer months, it only takes about 3 weeks to convert garden and kitchen waste into useable compost. In the winter it takes longer. As there are two compartments, it’s best to fill one compartment to about 90% full and then start filling the second compartment. Once the second compartment is full the contents of the first compartment should be ready to use. I fully recommend this composter. It’s by far one of the best tools I have ever purchased and has transformed my mindset in regards to recycling. I reckon the Government should be subsidising this product to help this country manage food and garden waste and at the same time help change people’s mindsets. In return we create good compost for our garden whether that’s used for flowers, fruits or vegetables. I now go one step further and feed my home made compost to worms in a home made horizontal worm migration bin and create lots of worm castings.
D**D
Instructions came in Swedish!
We've just started using our composter. It seems to be great - I have high hopes of great easy compost for the garden. It took two grown men over 3 hours to assemble - it's fiddly and the assembly instructions aren't IKEA standard. The instructions on how to use were in Swedish (not super helpful for non-Scandis). However, I found the instructions on-line and downloaded.
M**T
Disappointing product
Had high hopes of this product, it arrived well packaged and I and a couple of friends set about assembling it. Very disappointed to encounter problems with panels that didn't go together as expected, the insulation seemed to be proud on a number of panels and only through brute strength did we manage to get the self tapping fixings in place. Noticed that there was daylight between most of the panel joints and wasn't overly surprised when water ingress through these ill fitting panels made the proposed compost very wet. Used a silicone sealer on the ill fitting joints and things are better but I will wait and see how things develop. Perhaps I just got a 'Friday afternoon' unit or maybe it's a very good idea poorly executed ( and I speak as someone who built up an engineering manufacturing company from scratch such that I was able to sell it for many millions and retire at 56 I.e. I am not a mug punter when it comes to manufacturing and engineering) Overall I would think that caution should be exercised if you buy a Joraform, at the first sign of ill fitting parts, package it up and send it back, I should have !
L**S
A Very Solid, Well-Engineered Product. Excellent Swedish Engineering -- Enough Said. Assembly Required.
This is a really solid, well-designed piece of equipment. I was concerned about the stability of the steel tubing stand, but it is rock-solid when assembled, thanks to the cross-bracing on the bottom and back side of the stand. The materials used appear to be very high quality. The bolts are stainless steel, and all the metal tubing appears to be as well. The main drum is made of galvanzied steel sheets that have been powder coated (a low-visibility sage green color). The handles are solid molded plastic, and are pre-attached to the side panels. Not all side panels have handles on them, so pay attention to which panel goes in which location while you are assembling the unit. The compost tumbler was shipped and delivered much faster than the "advertised" time -- a Fedex Ground truck showed up at the door two days after I ordered, a pleasant surprise. It comes in two large boxes, and everything is double-boxed to prevent damage during shipment. Assembly instructions are sparse, with a number of small illustrations and almost no text. The manufacturer has an online video to guide assembly. I found it unnecessary. If you pay attention to the drawings, the unit goes together well. The assembly instructions strongly advise having two persons available for the assembly job. This is good advise, although I was able to do the entire job myself, using one tool (a 3 foot pipe clamp) that is not specified in the assembly manual. Assembly is straightforward and fairly easy until the last step, which is to assemble the 8 sides onto the two end panels to make the 'barrel." The side panels are lined with stiff plastic foam (insulation to keep the compost mixture warm as it "cooks"), and that foam must be compressed with a good deal of pressure to bring the pre-drilled screw holes into alignment for each panel. (Two stainless steel M3.5-15 sheet metal screws are used to hold each end of each panel in place.) I found the assembly went much easier if I used a pipe clamp (a woodworking tool) to hold the side panel in place while inserting the screws. It's tempting to use a power drill with a Phillips-head bit to drive those sheet metal screws into their holes. Don't do it. Stainless steel is not as hard and strong as carbon steel, and it is very easy to strip the heads on the screws with a power driver. I stripped several screw heads in the process and had to buy replacements. The only other "trick" in assembly is used in attaching the two end panels to the hexagonal sheets of foam that go on the ends, and similar assembly of two sheets of solid plastic to form a "sandwich" with the foam sheet in the center partition that separates the two sides of the composter. These sub-assemblies are held together with nylon bolts. There are no holes in the foam sheets (about 1.5" thick) so you have to push each bolt through the foam. I found it easier to push the bolt part way through one direction, then remove it and push it all the way through the other side. One could use a power drill, but it is not necessary. The sparse assembly instructions assume a certain basic knowledge of mechanical systems. They do not, for example, say which size wrench to use for which bolts.The 9/16" wrench is used on the head of the six metric bolts that attach the cross-braces. The 1/2" wrench is used on other nuts. (Metric equivalent wrenches would be 14 mm and 13 mm.) The instructions also don't describe the orientation of the self-locking (aircraft type) nuts that are supplied for application to the six M8 bolts and two long steel shafts at the top and bottom rear of the unit's stand. If you are not familiar with these nuts, the plastic "rim" that is visible on one side of the nut points out toward the thread end of the bolt (away from the head). Read the assembly instructions carefully and make sure all the parts are in their correct position before bolting things together, and you'll do well wih assembly. At the time of this review, I haven't actually started composting with this product, but it certainly looks like it will do the job well. The heavy duty components and thick foam insulation should help to retain heat in the composter and speed the composting process.
V**A
Works great. Assembly was somewhat challenging
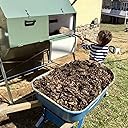
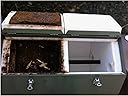
Works great. Assembly was somewhat challenging, but not too much so (make sure to watch video on YouTube first). Composts very well, minimal leaking, takes about 4-5 weeks for a chamber to ripen fully. Terrific solution for kitchen waste. We bought two, so in winter, when composting will slow down, we will not run out of space. Built well, solid and sturdy. Very, very happy with the purchase. Update after almost three years of use: Well, these composters are one of the best thing we ever bought. We live in climate zone 5a, so winters are somewhat harsh and rather snowy. Our composters work year round without fail. All kitchen scraps, food leftovers, some (but far from all) garden waste, paper towels and napkins are now turned into prime quality compost. There is minimal leakage from the bottom of the barrels, but since they are located outdoors, it is not an issue. In winter we can see steam rising from the venting holes, that is how hot it gets inside the chambers. I have been playing with different proportions of the brown/green waste. Sometimes I add peat moss, sometimes alfalfa (buy it in the farm store, where they sell it as food for rabbits), sometimes just shredded paper (checks, documents etc) from our shredder, sometimes shredded leaves. It always, always works. A couple of times felt that it would be beneficial to use compost accelerator. Just so the chambers get somewhat of a "do over". Used it, again results were great. We are now never without compost. With four separate chambers in different stages of ripening I always have some compost ready to add into the planting hole or just spread around. The paint on the composters faded a little bit in the sun, but they still look pristine. Rain washes them, wind dries them off, no other maintenance is required. Also worth mentioning. I have two old metal wheelbarrows (got one at a yard sale for $1 and another came with the house). They are beaten up, but I will never get rid of them, since they fit perfectly underneath the composters for emptying. These wheelbarrows have low profile and are entirely made out of metal. I just roll one of them underneath the chamber to be emptied (right to the cross on the back), open the chamber door and rotate the composter. Works like a charm. It sounds ridiculous, but these composters now are one of my most prized possessions.... Yeah, I know, gardeners are nuts..... Update after 7 years of use: Still using this composters and still loving them! Came to check if these were still available beacause I just recommended them to someone. Was astounded to see a negative review (with photos). I do not know who these people are, I do not know what their deal is, but their composters had to be fully submerged in acid to look like they do. Here are pictures of our composters, located outside (no protection) in zone 5, after seven years of use. I rely heavily on reviews when purchasing new items, hopefully this will help.
R**A
Not an easy screw.
Well, I finally got a compost tumbler. After much research (I originally wanted a mantis) I found that most people using a tumbler preferred the Joraform. It looks nice, is sturdy, well made. Why not? I don’t spend large amounts of money on myself, so I asked for it for Mother’s day. My husband finally ordered it around June. (Late, I know.) It arrived the last day of August. So shipping through Amazon was unexpectedly long. No biggie. I have a lot to learn about composting and wasn’t expecting to get it going in any real significant way this year. It wasn’t until mid September that I had a spare day to assemble it. Since my hubby had a project going outside, I thought we could spend the day doing our projects together, 6 feet apart. (Sounds Covid-y.) He started installing his cold air intake and I started on the Joraform. I actually did as he did and pulled up the assembly video (made by Joraform) on youtube and watched the whole thing first. Then I rewound it and started with each individual step. It was surprisingly easy. I even stopped to help hubby with a fee issues he was having with his project. It finally came time to put the panels on. It all went to hell from here. Now, to be fair, the assembly video said you “may” need a second person to do this. It should have said “You will need a second hand and a 250lb gorilla to accomplish the next several steps.” I managed to place the first panel on my own. It was tough, but I got it and my false sense of accomplishment set in. Then, panel number two. Holy crap. There was no way that thing was going on. The foam inside, while snug, was so tight fitting that there was no way I could line up the holes. I struggled. I got mad. So I stopped and helped hubby finish the cold air intake in exchange for help with the Joraform. We attacked together. Even my husband, with his sexy arms of steel, were no match to push down on the panels to align the holes for the screws. We maneuvered and turned and swapped places with no avail. There was no way of getting enough pressure onto the thing to align it all. I finally suggested we should lay the thing in it’s side and have him and his 200lb self sit on the panels. It mostly worked. I still had to exude large amounts of force to get the screws to go into place. I did not realize, but at one point I was grunting to get the screws in. I glanced at my hubby and he had that silly grin and was raising his eyebrows at me. He mentioned liking the noises I was making. I very quickly made sure there was no more grunting of any kind, but that didn’t stop him from copping a feel every moment he got a chance. I finally told him to finish the screws. (Another cheeky grin from him.) But alas, my weight was no where near enough to press the panels down to align the holes. Fatty had to go back to sitting while I did all the work. We finished a couple hours after I started on it. I think it’s going to be a great tumbler, but don’t order it unless you have a gorilla or a horny hubby to help you assemble the darn thing. Don’t trust the assembly video. It is NOT an easy process. On the upside, he got his cold air intake installed and I got my tumbler assembled and we both got a workout in more than one way!! 😉
S**E
Composts well, but extremely difficult to assemble
In terms of composting well, the Jora Composter (mine is a JK270) does a good job. It makes heat well and holds it well due to the thick insulation, and it comes with good instructions for maintaining a good carbon:nitrogen ratio. I replaced an Aerobin 400 with the Jora, and so far the Jora is much better and solves a couple of persistent problems I had with the Aerobin: there was always a constant trail of ants going to and from my compost, and black soldier fly larvae regularly ruined my compost. There is absolutely nothing that would keep them out of the Aerobin. On the Jora, the only place they could possibly enter would be the air vents on the ends, and I made that impossible by attaching pieces of old window screen over the vents. I suspect the heat the pile produces mail also be enough to kill them; my Aerobin never made this kind of heat. However, the Jora is really, really, REALLY hard to assemble. I'm a reasonable amateur mechanic, do a lot of my own work on my autos and nearly all of it on my motorhome, and when I was young and a hotrodder, I did all work that didn't require a machine shop. Neverthless, I found this thing to be a total pain. The video they have on their website showing one guy easily putting it together has to be rigged, probably by using a Jora with thinner than standard insulation, so that the pieces just fit together. On mine, fitting the panels into place requires an extreme amount of force to compress the insulation enough to get the screw holes lined up. My two teenagers together weren't strong enough to be the "second person," not even with me helping with one hand and starting the screws with the other hand and a magnetic screwdriver. We got a few of them, but many were simply undoable. Enter my friend, who is a construction worker. He came over on a Saturday to help me with it. The two of us, even with the assistance of a couple of heavy duty ratcheting tie-down straps, weren't enough to compress the insulation enough to line up some of the holes, or even get close. He finally said that the only way we were ever going to get it together was to compress it as much as we could, then drill new holes, which we then proceeded to do. It's tight enough to not leak (just a little, sometimes, but the instructions say that it will, so I'll call it normal leakage), and works well now that it's done. Overall, I do recommend this composter, however: -As described above, the difficulty of assembly means a minimum of two people are needed to assemble the panels (you can do the frame by yourself; I did), and three people would be better. Heavy ratcheting tie-downs are also very helpful - I wish it were made of plastic rather than metal. Even in my fairly dry climate (southern California) I expect that after 5 years of standing out in the weather, it's not going to look so good. My Aerobin is plastic, in the neighborhood of 10 years old, has always been in full sun, and still looks great. Also, if they made it of plastic, the insulation could be encapsulated in panels and it would really be as easy to assemble as they show in the faked video -Finally, the way they show the panels going on in the paper instructions that came with the composter is different than the video on the Jora website. I started off following the paper instructions before I was aware of the existence of the video, and had to remove some of them and re-do them the way it's done in the video. So, ignore the paper instructions and go watch the video on the Jora website. -I think it would be worth it for Jora to provide options of shipping a fully assembled composter or having on-site assembly where possible. Knowing what I know now, if that were a $200 option I would gladly pay it. That's what a pain this thing was to assemble. If this thing were to break, I would buy another brand of rotating drum composter rather than hassle with putting another one of these together. Never again.
A**O
The build can be tough, but its worth it.
So for my wife's birthday, she decided she wanted to start composting after talking about it over dinner with friends. I decided given our suburban neighborhood that a tumbling composter would be best, and after some research and given we are in the Northeast, the Jora insulated composter. So I got the JK270, which might be too big for our needs, but it has been working like a champ. In 3 months we have produced one huge load of compost (which we combined with some potting soil for our strawberry and lettuce bed) and now have the second chamber going strong at 140F this morning when its 40F outside. I am still learning to get the moisture levels right, let it get to wet during the first batch at one point and it reeked a little then and had the dripping out the bottom, but doing better this time. I use mostly wood bedding pellets for the browns, occasionally paper shred. The best part though is since the JK270 is steel construction, and insulated, we are able to throw pretty much everything in it. Expired eggs, sauced vegetables, anything really is working well. We avoid bowls of liquid, but other than that, everything goes into the kitchen counter composter and then into the current chamber in the composter. Since its gets to 140F+ and holds that temperature, it kills anything of concern, and we havent had any issue (yet) with critters due to having meats/cheese in it. Yes, it was a PITA to put together, but it appears to be worth it and working very well. Sure we coulda gone cheaper, but this works for our lifestyle and location and the fact we can keep going during the winter is even better. Here are the extra things I got to support this in addition to the JK-270 Gorilla Carts GCR-4 4 Cu. Ft, 300-pound Capacity, Poly Yard Cart, Black/Yellow - Fits perfectly under the JK270 on its stand. Easy to wheel around. Holds a bag of soil + load of compost. Tierra Garden GP104 2-in-1 Galvanized Woven Wire Garden Sieve, Soil Sifting Pan - Perfect for sifting the compost into the Gorilla Cart and then dumping unfinished stuff back into the other side. This lets the microbes carry over and makes the compost fine enough for ready use. Reotemp 20 Inch Fahrenheit Backyard Compost Thermometer with Digital Composting Guide - Keep it in and check temperature each morning before rotating (though you have to remember to remove it or you end up losing it in the compost, and no, it hasnt happened more than 2x, really. American Wood FIBERS PELLETS PinePellet Bedding, 40 lb - Working well, no additives, great Brown part and also helps control odor. Jobe's Organics 09926 Fast Acting Fertilizer Compost Starter, 4 Pound - Not sure this was needed, but used some in the first batch and havent needed to since. Rust-Oleum 7701830 Stops Rust Spray Paint, 12 oz, Gloss Crystal Clear - I had seen some issues with the JK's having rust forming, so i got this and used it to coat anywhere i accidently scratched the paint putting it together, or where screws went through. Maybe not needed, but for the cost i want the JK to last. EPICA Stainless Steel Compost Bin 1.3 Gallon-Includes Charcoal Filter - Our kitchen counter bin for the kids and us to dump into and empty into the JK every day or so. Has a charcoal filter on lid to minimize odors
Trustpilot
5 days ago
1 month ago