Description
🚀 Elevate your IT game with the rack that adapts, supports, and moves with you!
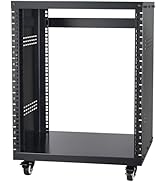
- MOBILITY MEETS CONVENIENCE - Equipped with casters for effortless relocation—move your setup anywhere, anytime.
- COMPLETE ACCESSORY KIT INCLUDED - Everything you need to assemble and secure your equipment—no extra trips required.
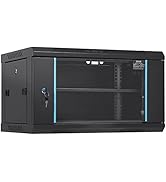
- HEAVY DUTY STRENGTH YOU CAN TRUST - Supports up to 500 lbs ground-mounted, built from durable carbon steel for long-lasting stability.
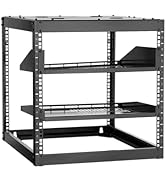
- FLEXIBLE DEPTH FOR ULTIMATE COMPATIBILITY - Adjusts from 23 to 40 inches to fit all your AV and networking gear with ease.
- DUAL MOUNTING OPTIONS FOR SPACE OPTIMIZATION - Free-standing or wall-mounted to maximize your workspace and keep clutter at bay.
The VEVOR 12U Open Frame Server Rack offers adjustable depth from 23 to 40 inches, supporting up to 500 lbs when ground-mounted and 150 lbs wall-mounted. Crafted from carbon steel, it features a user-friendly ergonomic design with casters for easy mobility and versatile mounting options. Ideal for professional environments needing reliable, space-saving server and AV equipment organization.