Buy anything from 5,000+ international stores. One checkout price. No surprise fees. Join 2M+ shoppers on Desertcart.
Desertcart purchases this item on your behalf and handles shipping, customs, and support to Brazil.
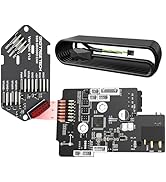
⚡ Upgrade your Ender 3 to smart, silent, and cool — because your prints deserve the best!
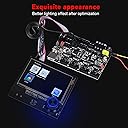
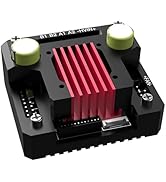
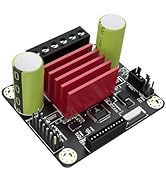
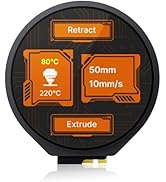
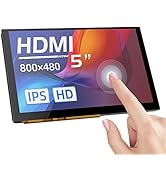
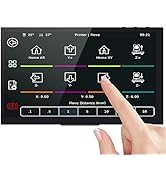
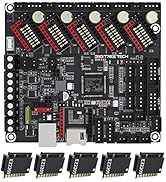
The BIGTREETECH SKR Mini E3 V3.0 control board paired with the TFT35 E3 V3.0.1 touchscreen is a premium upgrade for Ender 3, Ender 3 Pro, and Ender 3 V2 printers. Featuring triple CNC fans and redesigned heat sinks, it ensures superior heat dissipation and quieter operation. The advanced SPI output supports flexible peripheral power options, while the dual-mode touchscreen enhances user experience with versatile printing controls. This plug-and-play combo is engineered for seamless installation, delivering professional-grade performance and reliability.


| ASIN | B09LCKPV4G |
| Brand | BIGTREETECH |
| Brand Name | BIGTREETECH |
| Color | Black |
| Customer Reviews | 4.0 out of 5 stars 206 Reviews |
| Display Type | LCD |
| Included Components | BIGTREETECH SKR Mini E3 V3.0+TFT35 E3 V3.0.1 |
| Manufacturer | BIGTREETECH |
| Material | PCB |
| Material Type | PCB |
| Model | SKR Mini E3 V3.0+TFT35 E3 V3.0.1 |
| Part Number | SKR Mini E3 V3.0 + TFT35 E3 V3.0.1 |
| Smart Home Compatibility | Not Smart Home Compatible |
| Voltage | 24 Volts (DC) |
K**S
BTT SKR mini E3 V3 and TFT35
Picked up an old Ender 3 as my first printer and I didn't have 3D printing experience, but had 2D and 3D modeling experience as well as an electrical background working as a service technician for over 10 years. The main board on the ender 3 was messed up at the card reader so the upgrade was a necessity. Spend a few more bucks and get a double z axis kit and direct drive extruder. Was able to do all the upgrades at once and get it all set up easily. The TFT cable needs to be re-pinned at the 5 terminal end, it's not right. There's a few guides on it. Haven't gotten the WiFi part figured out yet but I've only been printing stuff for 2 days, I'm sure it can be done without much trouble.
S**8
Great Upgrade for Ender 3
I bought this to replace the 8-bit board that was in my Ender 3(one of the first versions). The replacement wasn't hard and now my printer is running great. Just take your time and switch wires like-for-like. I'm loving the touch screen and the wonderful colors that go with it. A great update that my Ender 3 really needed to compete with today's printers.
R**N
The screen sucks, the mainboard might work?
Avoid this waste of money. The screen is so insanely pathetically underpowered and slow to the point you can't even hardly baby step the z while printing. THAT IS HOW HORRIBLE IT IS. Get any other board and screen other than this lump of coal. This was a waste of $90 and who knows how many hours of my time now. I was impressed at first but the Screen code is horribly flawed. This thing destroys your bed. How? Well when you use the probe offset feature, if it rams the nozzle into the bed what do you do? There is no stopping it. The code sucks SOOOOOO BAADD that it doesn't bother to use your BL touch, NO WHY DO THAT JUST RAM THE PERSONS BED WITH THE DAMN NOZZLE. So you turn it off to stop it. Ok when you turn it on what do you think it does???? It runs your BL touch, then doesn't raze the nozzle. So you go into the Movement setting and try to raise the Z offset to not carve your bed, right. What does it do? It tells you that you can't move the damn hotend until you home the printer. OH JOY SO. So what do you think it does when you try to home it? It decides now is the perfect time to drag the damn nozzle over the bed and carve it up more. Isn't that just awesome. Why for the love of god not use the damn BL touch or allow the user to raise the Z without homing or atleast raise the bed before moving. So to sum it up. If your settings are off and you go to set the p offset feature, it first rams your nozzle so hard into the bed it actually knocks the whole assemble off. Then if you turn it off and on again, you are stuck with your nozzle rammed as hard as possible into the bed and no way at all to get the damn thing to stop. The only way I found to move the nozzle up when it is eating the bed is to turn off the printer, turn it back on and then choose the marlin screen, then choose Z offset wizard, which has the only smart code you will find in the screen and actually raises the damn bed first. Again the screen CODE IS SO HORRIBLE that instead of doing the smart thing and raising the hotend, it just prefers to eat your bed and ruin your nozzle instead. Isn't that nice? Isn't that what you want???????? So now my bed is SEVERELY RUINED and I need a new one.. The code for the Screen is 99 levels of amateur horrible code. AVOID THE SCREEN. Another super annoying issue with this kit is it just chooses a random printing speed every time, no matter what. Sometimes it is normal, other times it is 10%, and yet other times it is 160% SO AWESOME, SO COOL, JUST WHAT I WANT. I mean why use the Gcode settings I put in Cura when you can just do WTF ever you want. Yeah, woohoo . My runout sensor also doesn't work. I'm sure there is a setting in the configuration that needs to be changed. And that was another thing with this board, so many of the motor settings have to be inverted to make it work. The screen looks nice and works, but the underlying code is BARFTASTIC and Chock full o bugs. Want to load and unload filament using the built in feature??? TOO BAD SO SAD ERRORS FOR YOU!! I mean it goes on and on. Full of bugs. The screen makes working with the board easier than the stock Creality screens except for a the bugs/issues. The code for the screen in it's latest version has some irritating bugs. For example it keeps telling you that you need to home the bed before moving, even if you have already done that. What happens is if you do not interact with the printer for more than a minute it somehow forgets that it has been homed already and demands you rehome the printer. This gets SUPER ANNOYING when you are working on the printer. For example I moved the z axis up to change the nozzle, when i went to lower the damn thing it barfs at me that I must home the printer before moving. I think the issue is the fact that the screen is running it's own version of marlin and it connects to the printers mainboard, which is running it's own marlin. In this configuration, the screen is acting sort of like Klipper, it sends the instructions to the printer and displays what is going on. I think there is some setting that turns communication off after a minute. So it is like reconnecting to the mainboard all over again. Another issue is swapping the filament out with the option in the menu doesn't work. It just gives some stupid error that I haven't looked up yet. You have to manually control the extruder and reverse the filament out. I haven't had enough time to dig into the problem further. You can use this in many other printers other than the Ender 3. I am using it in an Ender 3 max which has a larger print bed. In order to do this I had to compile my own Marlin for the board, which is not hard at all, there are videos on youtube on compiling marlin. I'd actually suggest configuring and compiling your own marlin for the mainboard. I haven't messed with the screen code much, I downloaded and installed an updated version without compiling my own. I may in the future try compiling my own marlin for the screen to try to fix the bugs I found, but that will require actually editing code which I don't have time for right now. This mainboard will work with Klipper. So I plan on avoiding the overpriced screen of fail and replacing Marlin with Klipper on a Pi clone. But the screen is junk, it has too many bugs. I wish I knew this before I bought the combo. The mainboard is good, the screen sucks. I could have saved $45 and bought a pi clone if I knew how bad the screen was. Someone honestly needs to fix the screen code. I have yet to get this working properly. The z offset is always off for some reason and I have to baby step each print to even get close to a nice first layer. It has been a waste of $90 so far. Marlin for one sucks big time. I am thinking that is part of the z offset problem I'm having. I've had more failed prints than successful. I would switch back to the creality board but I have a Geetech board I want to try next. But I will buy a SBC to run klipper before I waste more time with Marlin.
B**E
Buy parts separately don't buy kit
TFT35 screen was trouble from the start. Reflashed firmware did no good. Main board is fine. Everything works with old screen installed. In order to get a new screen, I have to return everything. I'm not taking the main board out again. So, buy the parts separately, not in a kit like this. Update: The seller sent me a new TFT35 screen and everything works now. Deducted one star for the hassle. I still stand by my recommendation to buy the parts separately vs. this kit. It took two weeks to get this resolved and would have been significantly less time and trouble if I could have replaced just the defective part.
J**H
Great Product
Very easy swap with the creality v4.2.2 board. Uses same location as stock ender 3 pro board location. Printer is super quiet. Having the touch screen is a must. Will be purchasing another combo for my other printer!
B**E
Great upgrade for Ender 3
Very impressive for out of the box. Very direct. Make sure you plug in both cables to the touchscreen. Opens up a lot of tuning and customization to the user. Very happy.
S**.
Worked great ..ender 5
Worked out great.. some hiccups but Github worked me through it... .
P**S
Almost great, but not quite.
The touch screen is gorgeous and the main board seems extremely well made. I had to knock a star off because this is definitely NOT just plug and play. You'd think that since these two units are made by the same company and come in the same package, that the two would work perfectly together right out of the box. Nope. When I first powered it on, the touch screen would not respond. Like at all. Even the knob wouldn't work unless I put it in Marlin mode. Turns out I had to put a blank text file called "reset.txt" onto an SD card and reset the touch screen. Great, so it works now, right? Nope. The touchscreen now says that no printer is detected. But when I switch to Marlin mode, it prints just fine. So as of right now, the graphical interface and touchscreen are useless. I've researched various solutions which just don't work. A little ridiculous to effectively have an MS-DOS interface with most of the advanced features simply unavailable. Well certainly the manufacturer, knowing that this issue has been extremely common for YEARS, must have an easy fix, right? Nope. In fact, if you check message boards, you'll see that not only are the manufacturer's reps useless in resolving this issue, they're pretty rude about it too. From what I can gather after hours of researching the issue, I have to reflash the main board software, edit the code myself, and then pray that it works.
S**N
excellent
cant fault it, its quiet, great screen.. i aint ven tinkered with the jumpers yet... out the box im happy... ditched my 4.2.7 for this, so glad i did
M**N
Goed product
Goed product , alles compleet en netjes ingepakt. Alleen geen documentatie meegeleverd wat resulteerde in wat extra zoekwerk.
P**.
Board is fine, but TFT stopped working after a year.
After a year, the TFT got stuck in the mode menu (where you choose whether you want Marlin mode or touch mode). I tried a few things I found online, but couldn't fix it. I'd return it, but I dont want to have to disassemble the board, wait weeks and get a new one without the screen. Furthermore, the touch screen did not make it easier to work. I mostly ended up using the Marlin mode. Get the board. Leave the touch screen.
M**T
Drop in replacement for a Creality CR-10s
This kit installed fairly painlessly into a CR-10s with a 2.1 8bit board.
O**N
El producto cumple con la expectativa y los estándares de calidad.
El producto ha llegado funcional y en excelentes condiciones. Yo he optado por solicitar la SKR Mini E3 V3 y TFT35 E3 3.0.1 en conjunto con la finalidad de hacer retrofitting a una antigua impresora que había quedado inoperante y los artículos han cumplido el cometido de traerla de vuelta, incluso mejorando considerablemente la calidad de impresión y disminuyendo el sonido emitido por los motores. En definitiva una mejora que recomedaría a cualquiera que busque mejorar su equipo de impresión 3D.
Trustpilot
2 months ago
3 weeks ago